Showing posts with label Gluten Free. Show all posts

Friday, March 31, 2017

Mexican Chopped Salad

This has to be one of the easiest recipes ever and I know it's going to be in our menu rotation a lot this spring and summer. Its so fast and easy and it's been my very favorite meal we've had lately. In fact Chris liked it so much he asked me to blog it so we'd remember to make it again.

Last night we wanted some sort of salad for dinner and had some leftover grilled chicken and some perfect avocados to use. This was the result. If I was making this for just me, I would skip the chicken because my serving was great without it. This was a huge main dish salad for two, but could easily be a side salad for more to share.

Here's how easy it is:


Mexican Chopped Salad

1 Chicken breast half, grilled and chopped
2 Avocados, chopped
1 to 2 cups Cucumber, peeled and chopped
1/2 cup Red Onion, chopped
1 large bunch Cilantro, finely chopped
1 large Jalapeno, seeded and finely chopped
Juice of half a Lemon
Salt & Pepper to taste

Mix to blend gently so the the avocado mixes with the lemon juice but doesn't get to mashed.

Serve as is or on a bed of mixed baby greens as we did.

Enjoy!


Friday, March 24, 2017

Butternut Squash, Spinach and Black Bean Tacos

For a good, long while I have been on kitchen auto-pilot making mostly the same things. The time has now come to work on my menus.

I'm currently researching the best diet for me as I start treatment for breast cancer and while I have just started the process I know that increasing the most nutritious veggies, herbs and spices is as important important as drastically cutting sugar. Cutting sugar has been easier than I expected so I'm focusing on getting the good stuff in.

There are so many different theories are out there - Vegan, Keto, Mediterranean, etc. - all been recommended by various people and sources. I can see pluses and minuses to most so am taking my time and learning what will be right for my situation with my necessary restrictions like gluten free, dye free, etc. So while I continue to research I'm making lots of old favorites (especially Sri Lankan recipes with all the turmeric, ginger and spice) and some new vegan dishes.

Vegetables are a favorite, so it's not a burden to try and reconfigure my diet but it can be a challenge to make them a main course when you love spicy flavors and strive to use only whole foods rather than processed items.

The guys are not changing their diets but are getting exposed to lots of new veggie dishes in the process. So far they are just adding them to their usual meals and it's working out fine for everyone. Joe, especially, has surprised me with embracing arugula and watercress in his salads and trying some different roasted veggies. So in many ways this is a win win for us.

This is one dish I experimented with on our last Taco Tuesday and we liked it so much I made it all over again on Friday - doubling the recipe for leftovers. It's super fast and easy and very satisfying.

I've tried this combination in a crispy taco shell, without tortillas in a bowl and wrapped in in collard leaves. Every version was delicious and I've got another two pounds of butternut squash to saute tonight.

Butternut Squash, Spinach and Black Bean Tacos

Saute in a medium sized saute pan:

1 tablespoon Coconut Oil
1 large Onion, minced
4 large cloves Garlic, minced

In another small saucepan heat:

2 cups Black Beans (approximately, either homemade or canned)

When the onions and garlic are softened, add:

1 teaspoon Cumin
1/4 teaspoon Cayenne (this will be spicy - just a dash if you don't love it hot)
1/2 teaspoon dried Oregano
1 pound Butternut Squash, cut into cubes

Continue to saute until squash is cooked through - about 15 minutes or so. I mashed a bit with the back of a spoon as I stirred.

Just before you are ready to serve, toss in:

2 cups packed and rinsed Baby Spinach which will wilt and heat through in a minute.

Serve in taco shells, as nachos, in bowls or rolled in a large steamed kale leaf and top the squash and spinach with black beans, and guacamole and any favorite salsa you like.

We love to add a mixture of cilantro (one whole large bunch), onion (one medium to large) and jalepeno (at least one large) all minced together and liberally spooned on top. I make up this mixture at least once a week and use it to top almost all Mexican and Asian foods I make. It will keep a couple of days in the fridge.

Hope you enjoy it as much as we have.


Monday, February 27, 2017

Almond Flour Scoop Biscuits

In my attempt to greatly increase beneficial veggies, herbs and spices and lower the sugar and carbs in my diet, I am revisiting some favorite old recipes and sites. One of my very favorite sites is Elana's Pantry. Elana has beautiful, simple to follow recipes using some of my favorite ingredients like almond flour and coconut flour. She has been such a great inspiration and made our gluten free living so much sweeter - especially her gluten free cupcakes!

These days I find that my veggie meals fill me up initially, but my tummy starts to rumble well before my next meal. Adding a little more low carb protein helps balance things out for me. Elana's biscuit recipe is relatively low carb and easy to make, but with my energy levels waning these last few weeks between surgery and the flu I found a way to make them even easier and lowered the carbs further.

While I loved the flavor of coconut oil in Elana's recipe, the coconut oil I have on hand is very strong. I love it at breakfast but it kind of clashes with some meals.

Switching out to an avocado oil gave the finished biscuits a really mild flavor and the same nice texture. Cutting the sweetener out completely still left a delicious biscuit. Adding all the ingredients to the same bowl and scooping each biscuit with a baking scoop (ice cream scoop) cut washing and prep time in almost half. The scoop makes a drop biscuit much more uniformly. Baking them in a 9x13 glass pan that I can store in the fridge meant one less pan to wash, too.  I'm not sure if necessity is the mother of invention or exhaustion is. Either way, it's a win.

I've been using Blue Diamond Almond Flour since our Costco started carrying it. I know that isn't a brand Elana used to recommend but it has worked very well for me. I've also made the recipe vegan because of all I am reading about flax meal again. Still great texture but I'll include the egg/flax information so you can decide what works best for you.

The biggest issue I have with nut flour baking is the calorie content. It is high, but one biscuit is satisfying and makes a big mug of miso soup a meal. It rounds out a smoothie or a salad and holds me over. I just have to resist the temptation to eat several.

Almond Flour Scoop Biscuits

Preheat oven to 350 degrees.


In a large bowl stir together:

1/2 cup Avocado Oil
4 Flax Eggs (4 Tablespoons Golden Flax Meal plus 6 ounces water OR 4 large eggs for non-vegan biscuits)
1 teaspoon Salt - Sea Salt or Himalayan pink are my favorites
1 teaspoon Baking Soda

Once well combined, add:

5 cups Almond Flour

Mix well and don't worry about over mixing like traditional flour. These will still be moist and tender. Once fully mixed take your handy scoop and scoop out 12 to 14 nice round biscuits onto a baking sheet or right into a 13x9 baking pan. After scooping I usually give the round biscuits a little push with the back of the scoop to flatten slightly as in the photo above. Both pans have worked perfectly and whether you leave them round or flatten they bake pretty much the same.

Either pan, bake at 350 degrees approximately 15 - 20 minutes - a bit longer in the baking pan and a bit shorter on the baking sheet. They'll be a light golden when done as in the photo on the right. Be sure to let them cool about twenty minutes or they might be crumbly as in my photo at the top. I store mine a few days in the fridge and bake about once a week. If I want a warm biscuit I just pop it in the toaster oven for a couple of minutes.

Enjoy!

*Or 4 Large Eggs for Non-Vegan Biscuits

Tuesday, January 5, 2016

Spicy Asian Onion Mushroom Soup!

Happy 2016!

2015 was such a blur here and I really got out of the habit of posting recipes and even experimenting in the kitchen as much as I enjoy. As I look to 2016, it is time to start being proactive with our menus and having fun in the kitchen again.

I don't make New Years resolutions, but I do want to eat a little healthier this year by increasing our vegetables and by lowering my beloved carbs. Nothing too crazy or austere, but I'm hoping to add new flavors and recipes to make this challenge one that sticks.

This simple and delicious gluten free and vegan recipe is now on the rotation. It actually started as French Onion Soup and morphed into an Asian-inspired light, but satisfying meal. This is the kind of soup that will no doubt continue to evolve depending on what's on hand and what sounds good. So be creative and make it your own. A bit of rice noodles or one half cup of dry rice can be added towards the end to make a heartier soup. Add more onions if you like and vary the type of mushroom you enjoy. Thinly sliced Napa cabbage, bean sprouts or any veggie you like can be added. A big spoonful of kimchee on top is also amazing.

The Sriracha, Miso and Soy Sauce can be adjusted to taste. You may want to start out with less heat and use half the Sriracha. Its easy to add more later. Fresh garlic, turmeric and ginger are a favorite combination but you can use dry spices, too. We like lots of different stocks and broths in our soups from homemade to purchased, but I really love Pacific's Organic Mushroom Broth. Simple ingredients and a really nice, deep flavor makes a wonderful base for the soup.

Asian Onion Mushroom Soup

In a large pan over medium heat saute:

A splash of Olive Oil
1 pound Sliced Mushrooms
3 large Red Onions

As they soften add:

Garlic - at least one clove minced, but more is great 
Turmeric - I use fresh and approximately 1 teaspoon, minced
Ginger - I use fresh and approximately 1 tablespoon

As everything is completely cooked and barely starting to brown, add

2 quarts broth (if I am out of homemade I use Pacific's Organic Mushroom Broth)
2 tablespoon Miso Paste (I love Miso Master Organic Red Miso)
Sriracha - to your taste, I use at least a teaspoon for a very spicy soup
Gluten Free Soy Sauce - about a tablespoon

Continue to simmer covered thirty minutes or so, but the flavors will continue to improve if you can wait.

When ready to serve, ladle into bowls and top with a large spoonful of this mix:

1 bunch Cilantro, chopped
1 tablespoon fresh Mint, chopped
1 Jalapeno, minced
1/2 Onion, minced 

The fresh herbs and crunchy jalapenos and onions work so well together with the warm, aromatic soup. We love it and I hope you do, too.

Enjoy!

Wednesday, March 25, 2015

The Bee's Knees Gnocchi!

Kecia Johndrow is someone I "met" online several years ago through the Feingold Association. Four years ago she opened her own gluten free bakery, Bee's Knees Bakeshop in Cedar Park, near Austin, Texas. Not only does she make beautiful baked goods like cakes, pies, brownies and cake balls; she also serves breakfast and lunch.

Now Kecia has written her first e-cookbook, Gluten Free is the Bee's Knees, A Bee's Knee's Cookbook.  A mutual friend let me know about the e-book and I bought it immediately.

The variety of recipes is great. Soups, appetizers, sides, dips, casseroles, breakfast items, entrees from Mexican to Cajun to Italian, desserts and more are included. Kecia has included answers to some frequently asked questions and shopping tips, making this a great resource for anyone newly gluten free.

She graciously has allowed me to share one of her entrees here for a little sneak peek. I had a hard time choosing because everything sounded really good.


Ultimately, I chose Gnocchi because it's one of my favorite comfort foods.  Kecia recommends topping them with a marinara sauce for a GFCF meal.  Since we do some dairy I chose to serve them drizzled with Laura's Garlic Herb Dip and a sprinkle of Asagio cheese.

I am certain mine are not as pretty as Kecia's but oh my goodness, they were delicious! I used brown rice flour and made them a little larger than Kecia recommended so they took a couple minutes longer to cook. Chris and I absolutely loved them and went through nearly half a batch between the two of us.

Here's Kecia's recipe, straight from her book:

Try it, I think you'll enjoy!

Happily shared on Gluten Free Wednesdays thanks to Linda at The Gluten Free Homemaker.

Wednesday, March 11, 2015

Cilantro Hummus!

Traditional hummus is one of my favorite things all year round. Whether I make or purchase it, there is almost always a container of it in the fridge. Hummus makes a great vegetarian protein snack with crackers (I especially love it with my flax crackers) or veggie sticks, and is an awesome spread on sandwiches. A favorite breakfast is simply a half a toasted gluten free bagel spread with hummus.

We love it plain or drizzled with olive oil and sprinkled with sumac or paprika. Chopped olives are my personal favorite, or addiction if I'm honest, these days.

My cilantro hummus is a spring and summer favorite.  It's creamy and cool and has a fresh pop of flavor. It takes just minutes to make and can be adjusted to your tastes easily.

Made as shown below it's very mild, at least with the jalapeños I use. If you like more heat, just add another jalapeño or switch to a pepper with more kick. Habanero is my favorite. The more cilantro, the better, as far as I'm concerned. I use a large bunch - about a cup and a half of washed leaves and stems. Cilantro has many health benefits so I'm always adding it to something I'm making.

This hummus is a great way to get your raw veggies in. Above I used daikon radish. I love the look of the perfect circles and crispy bite of the radish with the creamy hummus. Our veggie selection to the right wasn't the most exotic or beautifully sliced today but they were still delicious.

Cilantro Hummus is great as a spread on a veggie burger like my Chipotle Lime and Black Bean Burgers. My favorite crackers for this hummus are my Spicy Pepita and Almond Crackers which I like for a quick lunch. This combination also makes a nice appetizer with a lighter meal.

To really amp up the color and kick, spoon a little of Gabby's Green Sauce on top.

Cilantro Hummus

3 cups Garbanzo Beans
1 large bunch Cilantro, or enough to equal about a cup and a half leaves and stems
1 large Jalapeño, seeded
1 medium clove Garlic
1/4 cup Lime Juice
1/4 cup Olive Oil
Salt, to taste

While all ingredients can be put into a food processor at one time and blended, I like to use my Vitamix for an even creamier hummus.  If you use a Vitamix you will need to use the tamp to keep things mixing and moving to blend quickly. Just add all ingredients to the Vitamix at once and blend until smooth and creamy for about two minutes.

The flavor will improve as it chills so plan on letting it sit in the fridge an hour or two prior to serving.

Enjoy!

Happily shared on Gluten Free Wednesdays thanks to Linda the Gluten Free Homemaker!


Tuesday, December 16, 2014

Quick & Easy Gifts From My Kitchen....


I love to make pampering gifts like my body butter for my friends. With all the cold weather outside and heaters working overtime inside a little bit of pampering can go a long way to keeping your skin healthy. This is a perfect time of year to spend a little bit of time to make personalized gifts for those special friends in your life.

Thanks to the wisdom of Cheryl Harris, I realize that I also need to take a little time for me so that I can be there for the people I love.

Cheryl hosts a December Sanity Retreat on her blog. My dear blogger friend Shirley of Gluten Free Easily introduced me to Cheryl's blog a couple of years ago. I did a post about it at the time. Please  check out Cheryl's blog, she's switching things up a bit this year with guest bloggers and has links to previous years' posts, I bet there will be something that speaks to your heart.

Taking a quiet afternoon to make with a hot cup of tea and happy noise in the background (and then actually setting aside a jar or two for myself) made the time feel indulgent, rather than stressful. How much more relaxing does that sound than running to a mall and running all over trying to find things your loved ones may or may not be able to use?

My goal these last few days before Christmas is to be mindful to avoid stress and find time to relax while caring for the people I love. Each day between now and Christmas is a little more booked than the last so I need to find time in each day for the things that count. For me that means Bible devotional time, getting moving and eating wisely to stay healthy. I have a great devotional app and am enjoying Advent messages through She Reads Truth. Moving is easy when you live with a dog so I'm trying to up our walks. Being outside is always good for me and the weather has been cooperating more days than not. Eating wisely is just that - no diets or deprivation at all. Just making good choices so I don't get glutened or get too much sugar which also causes issues for me.

So now to our gifts, since the ingredients overlap, it's easy to get everything out and make all three recipes, if you want to, in less than two hours including computer time for the labels.

Avery Labels are a great, easy and economical way to dress up your gift. Avery.com has lots of cute designs you can personalize with your own text. It took just a couple of minutes to find the cute bee design and customize each version. I bought my labels years ago and just print up a sheet with a different label with each batch.

I like to use four ounce ball jars for the scrubs and body butter. It's a nice size to give and a handy size to reuse. However, for those gifts I ship I have been using plastic. The PET plastic bottles and jars are easy to find online or at most any health food store that stocks essential oils. This time I used a couple of sturdy Rubbermaid containers for shipping that I had purchased for my last batch. I'm switching over to glass and PET as I go.

My beauty/body care supplies and tools are kept separate from my other pans and immersion blender. Getting melted beeswax and oil scented with lavender off can be a struggle. Having inexpensive doubles and keeping everything in a box together makes making so much easier.

There are a lot of quality essential oils to choose from. My own box of oils has Young Living, Plant Therapy and Florihana. You can use whichever you enjoy but for these projects Florihana was my choice. I buy them through Tropical Traditions, my favorite coconut company. Florihana's Bergamot is Bergapten free, meaning it isn't photo toxic. Most citrus oils are photo toxic, meaning you shouldn't use them on skin that is exposed to the sun, you may get patchy brown splotches. Citrus oils are a great choice for a hand cleanser/sanitizer making Florihana's Bergamot my first choice.

This is a great gift for a friend with littles to throw in their diaper bag. It literally takes five minutes to put this together, including attaching your labels. The recipe below is safe for young children but can be used by adults. If you aren't using it for small ones, go ahead and add up to double the essential oils.

Bergamot and Lavender Hand Cleanser/Sanitizer

1 2 ounce Pet Bottle with dispenser top

Aloe Vera Gel
9 drops Bergamot Essential Oil
1 drop  Lavender Essential Oil

Pour Aloe Vera Gel into clean Pet Bottle almost to the top, leaving room for your oils. Add the essential oils drop by drop right into the bottle.

Make a cute label and attach. I like to use clear packing tape over the label on these bottles to keep it attached and looking good.

I like to use mine (double strength) after leaving a store before getting into my car or in a public restroom that has awful soap (pink soap with scents and dye cause reactions for me). In that case I rinse and scrub my hands in hot water, dry and then rub in a squirt of my hand cleanser.

*

A sugar scrub is wonderful to get the dry patches off and reveal smoother skin underneath. You can substitute Olive oil for the Avocado oil. An easy way to measure the liquid oil and the solid coconut oil is to pour one cup of the Avocado oil into a two cup measure and scoop enough coconut oil into to reach two cups. Frankincense and Myrrh were an obvious Christmas combination but you can certainly substitute oils you prefer one to one.

Golden Frankincense & Myrrh Sugar Scrub

3 Cups Organic Sugar (or more if you like)
1 Cup Coconut Oil
1 Cup Avocado Oil
1 teaspoonVanilla Bean Powder
30 Drops Frankincense Essential Oil
10 Drops Myrrh Essential Oil
Containers

Pour everything into a glass or metal mixing bowl and combine. If you like a more dry sugar scrub feel free to add a bit more sugar in 1/4 cup increments. Mash up the solid coconut oil with the back of your spoon or with an immersion mixer.

Pour into jars and put the lids on and then label. You will probably get about eight four ounce jars or more depending on how much sugar you added.

They are a admittedly a bit more beige than golden, but humor me so the name works!

*

Body butters save my skin this time of year. This one, is one I've been making for ages. I love it and it works well but I wanted a more simple version. One that had fewer ingredients and no whipping required.

Simple Hand and Body Butter

1/2 cup Organic Beeswax Pearls
1 cup Coconut Oil
1 cup Avocado Oil
1 teaspoon Lavender Essential Oil
Containers

Pour everything but your Lavender Essential Oil into your pot and let melt slowly over low heat. While everything is melting I measure the Lavender Essential and pour it into one of the small jars. Stir to mix and once everything is combined turn off heat and pour the Lavender Essential Oil into the mixture. Stir again to combine and pour into your jars. Depending on the sizes you use, you will have about five four ounce jars.

Let cool completely before putting the lids on. Put on your label and you're done! Easy Peasy.

I spent more time at the post office today standing in line to ship some than I did making any one recipe.

When I use the sugar scrub I rinse well at pat dry. Rubbing in a little of the hand and body butter afterwards will keep your skin soft and glowing. Try the combination on your hands at night before bed, you should wake with nice, soft hands.

Wishing you a peaceful and relaxed holiday season so you can focus on what's important to you.

Happily shared on Gluten Free Wednesdays, thanks one last time Shirley! You are the best!!


Tuesday, November 25, 2014

I'm A Celiac's Magic Five Layer Bars!

Pam Jordan of I'm a Celiac is a super busy working, running, gluten free blogging and speaking mom of three who's niche is delicious, fast family meals. She's written yet another ebook just in time for Thanksgiving and Christmas, called Easy Gluten Free Holiday Recipes.

You'll find great tips for not getting "glutened" while eating out. The recipes are quick and easy and everything sounds delicious.

Appetizers, main dishes, sides and desserts are all laid out for you and there's a list of resources in the back. Easy Peasy.

The recipe that jumped out at me was the Five Layer Magic Bars. I used to love the similar bars my grandmother used to make. For some reason I've never tried to make them gluten free. Pam's genius idea is using gluten free gingersnaps instead of graham crackers. 

Even with the quick crushing and chopping of nuts these came together in about ten minutes. They are decadent and awesome.

The photo shows them after cooling about an hour, still warm and a little gooey and oh so yummy. After another hour they were cool enough to hold together into beautiful, perfect squares.

A batch will definitely make it to the Thanksgiving dessert table this year. 

Pam is kind enough to share her recipe from Easy Gluten Free Holiday Recipes here!

Pam's Five Layer Magic Bars

2 cups of GF ginger snaps
1/2 cup of butter, melted
14 ounce can sweetened condensed milk
1/2 cup pecans, chopped
1 1/2 cup chocolate chips
1 1/3 cup flaked coconut

Heat the oven to 350 degrees. Grease a 9x9 casserole dish. Place the GF ginger snaps in a plastic bag and crush with a rolling pin. Pour the crushed ginger snaps into a bowl and combine with the melted butter. Firmly press into the casserole dish for the first layer. The second layer is condensed milk over the ginger snap layer. Theird comes the nuts, fourth the chocolate chips and the fifth layer is the coconut flakes. Bake for 25 minutes. Let cool and serve.

Check out Pam's site and book and follow her on Facebook, too.

Don't forget to enter to win two great products from gfJules HERE.


Monday, November 10, 2014

GFJules - Gluten Free Thanksgiving with Jules EBook!

I'm so excited to share this amazing Thanksgiving ebook with you! 

Gluten Free expert Jules Shepard is sharing her newly updated 60 page ebook with us absolutely free if you download it before November 13th.

I've already downloaded my copy and love it. I think you will, too. 

Are you a guest at someone else's home this Thanksgiving? Jules has loads of tips. Are you hosting? Again, Jules has you covered.

There are delicious looking photos and recipes for the entire Thanksgiving spread and Jules has added a planning checklist to keep you on track. Even substitutions for other allergies are included. And so much more.

The link to the eBook page is www.gfjules.com/shop/gluten-free-thanksgiving-ebook/

Your code is: gfjules54601c422cb45

After you put the eBook into your cart on the gfJules site, you can just copy this code from this page and paste it into the box next to the orange "Apply Coupon" button in the gfJules cart. (You can also paste it into the 3rd box at the top of the Checkout page). They hit "Apply Coupon" and the $12.95 price will be deducted instantly, making the book available for immediate download. You'll see Download File: Gluten Free Thanksgiving EBook in red. Click it and start reading!

Hurry because this free offer expires on November 13th!

I'm looking forward to receiving two of Jules' yummy products soon and can't wait to tell you all about them.

Enjoy!

Wednesday, October 29, 2014

b.good - healthy, local, delicious and gluten free


b.good is a restaurant we fell in love with on a recent trip to Portland and Wiscasset Maine. We visited the Portland store at least three times in our five days in Maine. The other two days we were in Wiscasset.

The Portland, Maine store employees were friendly and helpful in keeping our food gluten free and so delicious. The six of us tried just about every gluten free item on the menu from burgers to salads to kale and quinoa bowls. Everyone absolutely loved everything. Especially awesome are the kids meals. We loved it so much it just didn't seem worth the bother to look up other safe restaurants.

The photo on the right is our last visit up in Maine. Loved the brick and the photos of the local farmers.

So the wait for the Raleigh store seemed ever so long. But open it did last week!

Chris, Joe and I went on Friday for lunch. This was their second day open and the line started clear across the restaurant. We obviously were not the only people anxiously waiting for them to open. The line moved quickly and the young man taking our order was friendly and capable. He quickly told us the couple of items we couldn't have and assured us the rest were safe.

The look of the Raleigh store is fresh and new and the farmer photos are local to our area. I was happy to later hear that JMF Photography took their photos.

We ordered and found a spot at the counter in front of the window to sit.  While I all but stopped drinking sodas years ago, at b.good I indulge with their outstanding Maine Roots soda. My family loves lots of their flavors but I always get the root beer. It's just like what we had growing up ages ago - creamy and perfect.

The guys' burgers and my chicken sandwich were perfect. The toppings are fresh and local, as are the burgers and chicken breasts. The veggie patties are house made and vegan (but not gluten free).

But the fries are amazing. If you're gluten free you know what a big deal safe gluten free fries are but at b.good you can get sweet potato or regular fries. Both are absolutely awesome.

The next day Marc, Marie, Aiden and I ran in for lunch. We arrived just before the doors opened and by the time they did open there was another family waiting with us. Several others filled tables before long.

The crowd Friday at lunch was definitely a work crowd and the Saturday lunch crowd was mostly young families. Steve Woodward, the owner said he was pleased with the lunch turnout but also pleasantly surprised by the dinner crowds, many of whom live in the apartments above the restaurant. How convenient would it be to just pick up dinner and take it right upstairs?? It seems a perfect location for everyone.

Marc and Marie ordered burgers and I ordered the spicy avocado lime kale and quinoa bowl.  It was my first b.good bowl and I ordered it as a healthy and maybe lighter choice. It was such a great combination of fresh veggies with a very spicy and flavorful sauce that I have a new favorite. So fresh and satisfying.

One thing I really love about b.good is their kids meals. Our sweet Aiden loves to eat and Marie and Marc feed him real, whole foods. The kids meals at b.good live up to their requirements and Aiden loves them.

Saturday he enjoyed a bunless turkey burger (freshly grilled and juicy) and a side of veggies. He loved the tomatoes, mushrooms, carrots and kale.


Aiden - so happy and busy with his kid's meal.

It's so nice to be able to walk into a restaurant and know that we can all enjoy healthy, local and delicious food without a worry about gluten. I can't recommend b.good highly enough.

Happily shared on Gluten Free Wednesdays at Gluten Free Easily!

Tuesday, August 26, 2014

Double Chocolate Peanut Butter Brownies


For the last year I have been making Elana Amsterdam's brownie recipe. It is so perfect in taste and texture and since calls for an entire jar of almond butter it's got a good protein to carbohydrate balance for us. Everyone who tries it likes it, it is simple and fast to make so I haven't tried another in all that time. I usually cut the honey a bit and the end result is still sweet and delicious. They also tend to stay moist and pack well without getting crumbly, unlike some I've made with gluten free flours.

Elana's Pantry is such a great resource and while I have given many of my cookbooks away, I hold on two of Elana's. They are carefully written and everything I have tried has turned out perfectly.

Yesterday I used peanut butter and upped the cocoa for a little change. While the almond butter gives a mild flavor in the original recipe, the same amount of peanut butter really jumps out. The extra bit of cocoa seemed to balance it nicely. I like to sprinkle mini chocolate chips on top to dress them up a bit instead of mixing them in the batter.

Because almonds are a high salicylate food making Elana's recipe with almond butter is Feingold stage 2, this peanut butter variation makes them a Feingold stage 1, gluten free, casein free treat.

Double Chocolate Peanut Butter Brownies
Preheat oven to 325 degrees

16 ounces     Organic Creamy Peanut Butter
1 1/4 Cups.   Honey (yes, 1 and 1/4 Cups)
3/4 cup        Cocoa
2 large.         Eggs
1 teaspoon   Vanilla
1 teaspoon    Baking Soda
1/2 teaspoon Himalayan or Sea Salt
1/2 cup         Enjoy Life Chocolate Chips

Mix everything together except the chocolate chips. I use my KitchenAid and it takes just moments. Spread into an un-greased 9 x 13 baking pan and bake. In my oven it usually takes 35 to 40 minutes.

Enjoy!

This recipe happily shared on Gluten Free Wednesdays at Gluten Free Easily.

Feingold information can be found HERE.

Wednesday, August 20, 2014

Primal Food & Spirits

The Raleigh Gluten and Allergen Free Expo kicked off with an amazing blogger/vendor dinner the night before the expo at Primal Food & Spirits in Durham. Primal welcomed the very large group in their private room and overflow in the dining area.

Chris and I were fortunate enough to attend the dinner. The ample private dining room was nearly full by the time we arrived so we sat in the dining area with Nikki Everett's awesome family and with vendor Stephanie of SAF Organics and her husband Ken of JMF Photography.  (Nikki is the amazing woman who coordinates the GFAF events all over - check the expo site to see when one will be near you).

I could say so much about Primal but I think that photo of the bucket of bread says it all! When was the last time you had delicious gluten free bread at a restaurant? Sometimes its the little things that mean the most and make you feel welcome.

We all ordered off the menu which could not have been easy for such a large group but our server made it look simple. Chris and I shared Crab Cakes with citrus cabbage slaw and orange aioli. Honestly, I cannot remember the last time I've had crab cakes since it had been a long while before I had to go gluten free.  Every bite was perfection. If I could order only one thing at Primal from now on, this would keep me happy.


Chris' fish was melt in your mouth good. Fish isn't my forte and although I grill, saute and bake it a couple of times a week I can never get it to this level of perfection.

The veggies were crisp and flavorful and the almonds were a perfect bit of crunch and flavor.

I had the veggie lasagna which was a really delicious layered dish of veggies and cheese. No pasta to get in the way of the fresh flavors.

After dinner Chris ordered a pot of French press coffee and we each picked a dessert. At this point we were both very content and probably should have skipped or, at the very
least, shared a dessert. The dessert
options were just too tempting.

Chris had the berry tart and it was sweet and creamy with a crispy crust and piles of beautiful berries. I chose the flour-less chocolate torte.

I have a beloved old recipe for a flour-less chocolate torte that I have been making for decades and it's the recipe I gauge others by. If you had me do a blindfolded taste test between the two, I don't think I could have told the difference.

It was dense and oh so chocolaty without being cloyingly sweet. Just exactly the way I love it.

So we finished our meal completely stuffed to the brim and happy. Our dinner companions were charming and interesting and we can't wait to go back to Primal Food and Spirits.


Wednesday, July 23, 2014

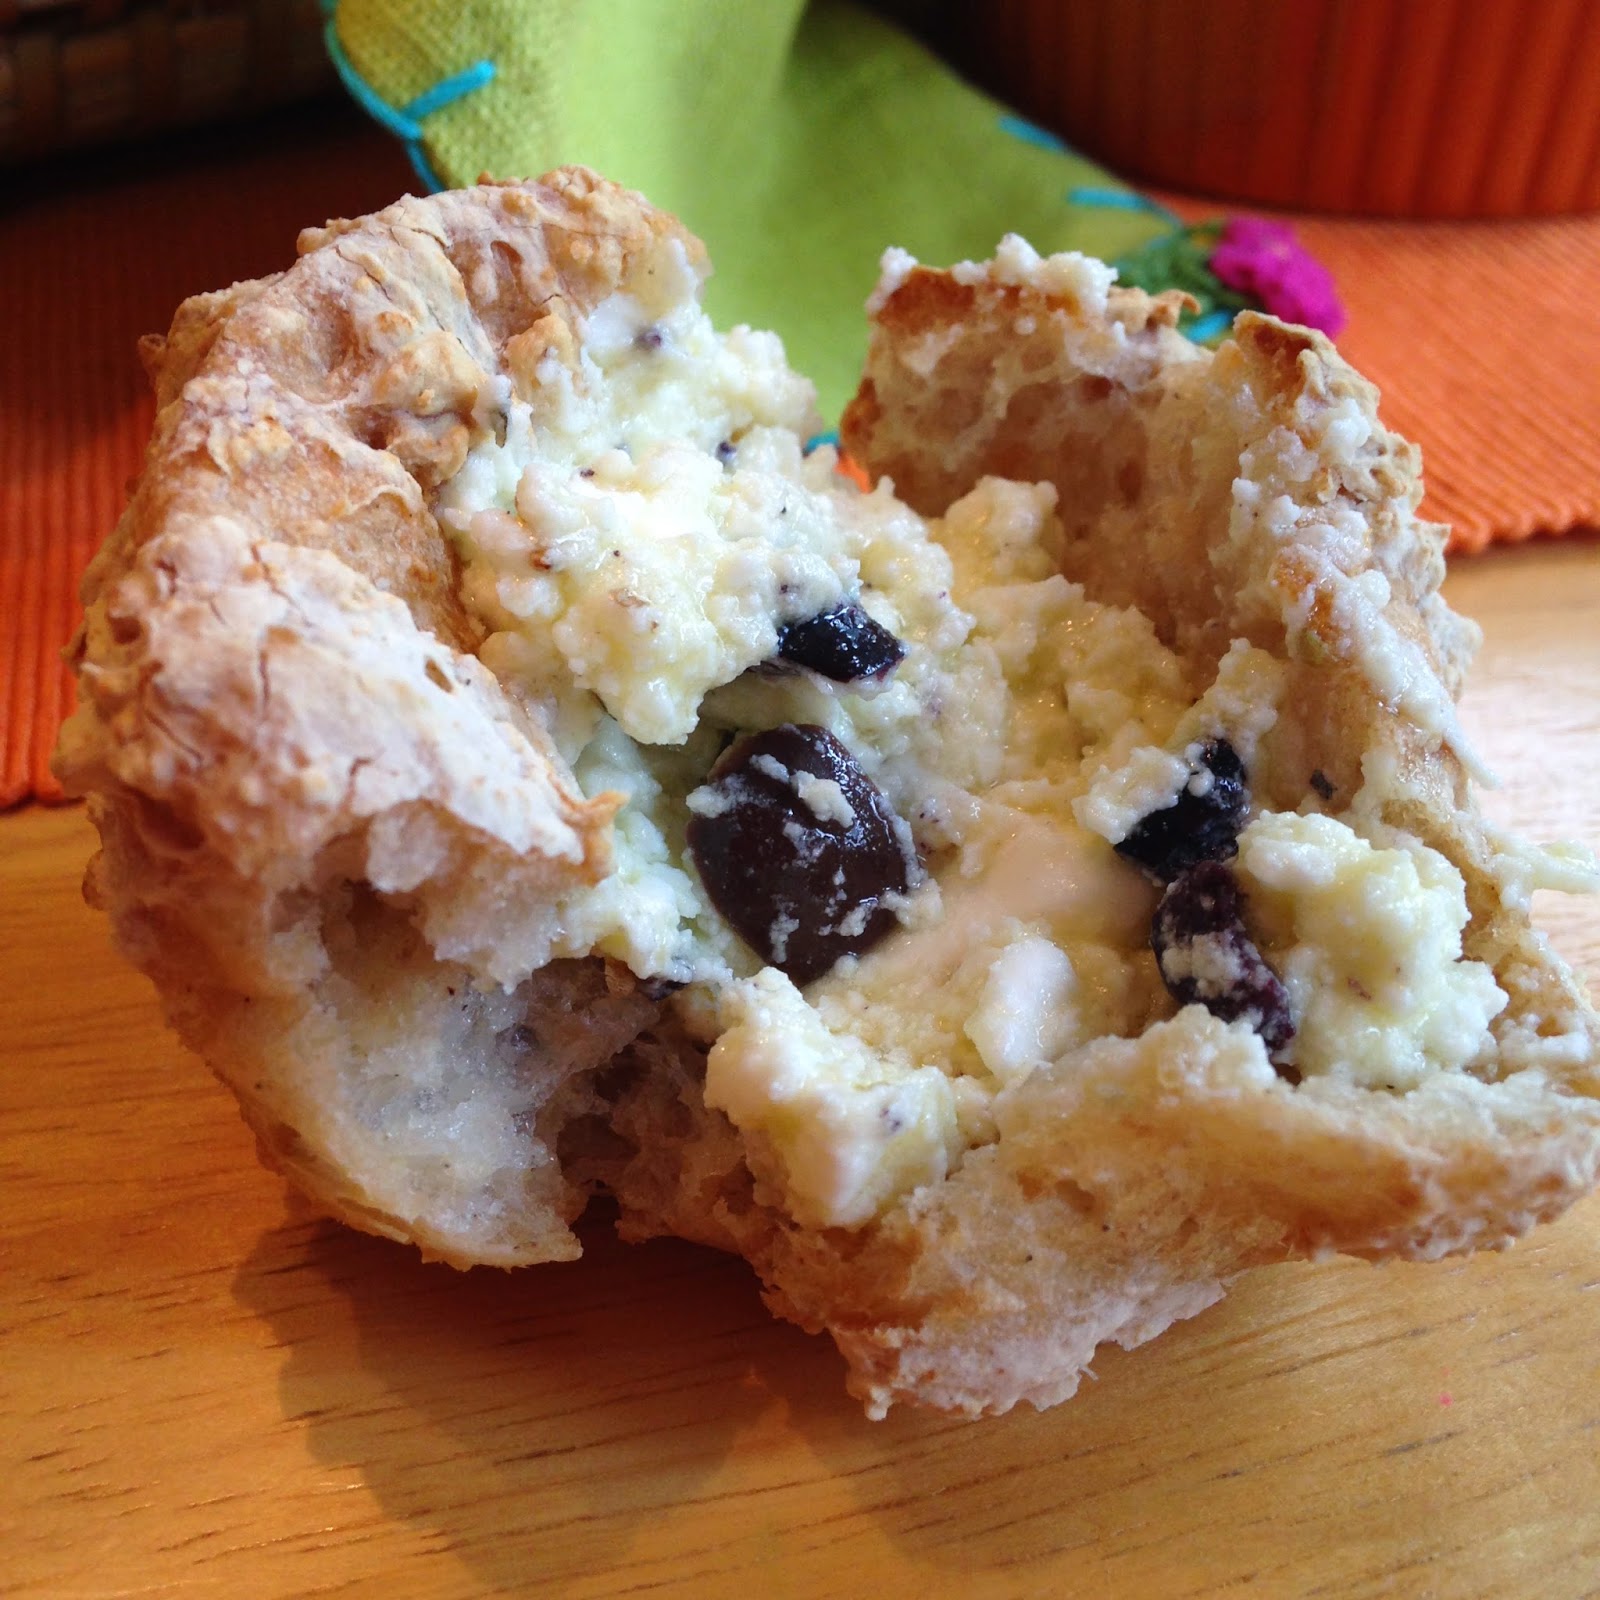
Feta & Kalmata Cheese Spread


This Feta Kalmata Cheese Spread is so simple and delicious.

It's great on crackers, melts into warm crispy bread, tops a salad, makes an instant creamy sauce on hot veggies, can be mixed into mashed red potatoes and more.

The briny soft cheese, salty olives and seasoning adds layers of flavors and makes just about anything taste amazing.

Because it's so simple your ingredients matter. Use your favorite Feta, most flavorful olives and best olive oil.

Feta Kalmata Cheese Spread

14 ounces Feta in Brine
6 to 8 Kalmata Olives, pitted and chopped
1/4 cup Extra Virgin Oil Oil
1 teaspoon Organic Oregano, dried
Dash Organic Garlic Powder
Dash Black Pepper

Put all ingredients into a large bowl and mashed. Use right away, but the flavor improves as it mellows.

Tonight I'll be spreading it over some delicious focaccia.

Next time I make it I will likely add sun-dried tomatoes and some chopped artichoke hearts. I think that spreading that combination over a partially baked pizza crust would be awesome.

Don't forget to enter to win a pair of tickets to the Gluten and Allergen Free Wellness Event in Raleigh on August 9th! Comment on this post to enter.

Enjoy!

Happily shared on Gluten Free Wednesdays at Gluten Free Easily!

Wednesday, July 9, 2014

Honey Sriracha Madness

So this Honey Sriracha Madness is Marie's fault entirely. You see, Marie, Marc and Aiden were running in the grocery store as Joe and I were running to our car a few weeks ago. 

Marie mentioned she was making Honey Sriracha Chicken for dinner that night and I was intrigued. A quick check of Pinterest later that night gave lots of variations. All super simple and I never did go back to look at a recipe.

And since it's been way too long since Aiden has made an appearance on the blog I am sharing this photo our amazing Gabby took at his dedication last month. It's hard to believe he's going to be one in just under a month!

But back to food. So why am I giving you three? Because it was a great excuse to put up a pic of Aiden and because it's really good! I love to play around with a good recipe and make it my own varying ingredients to my family's tastes. You can adjust the honey and Sriracha to your taste to make it sweeter or milder or scorching hot! 

For the Honey Sriracha Chicken Bowls, I just let one and a half pounds cubed chicken simmer in a tablespoon of coconut oil. As the cubes were barely cooked through I added about 1/4 cup honey, about a tablespoon Sriracha and a dash of lime juice and garlic and simmered until the sauce was thick and caramelized but not dry.

Stop when you like the consistency - really saucy to drizzle over the rice - simmer a little less time. Super caramelized, go a little longer.

It was amazing over a bowl of steaming rice with some fresh herbs sprinkled on top. We used mint, cilantro and basil for a Thai-inspired flavor.


Our favorite vegetarian version is this delicious Honey Sriracha Mushroom Sauté.

It's super simple. Clean and quarter a pound of mushrooms. Sauté mushrooms in a medium skillet in one heaping tablespoon of honey and one heaping teaspoon of Sriracha. No oil is necessary. Leave the lid off and stir everything together. The mushrooms will release their juices and the sauce with start to thicken after a few minutes. We love this served over rice (fried rice in this pic) and with kimchee.


Honey Sriracha Beef Lettuce Wraps have to be the easiest lettuce wraps you can make and are amazingly flavorful. To make these simply brown one pound of organic, grass fed ground beef with about a half cup of minced onions. Stir in the same heaping tablespoon of honey and heaping teaspoon of Sriracha and sauté until the sauce is thickened.


I topped lettuce leaves with julienned red peppers and spiralized cucumber and added the beef and cilantro. Chris loved these even though our lettuce didn't "wrap" this time. 

Relax in the kitchen and be creative - it makes eating healthy much more fun.

Happily shared on Gluten Free Wednesdays!


Thursday, June 26, 2014

Laura's Chocolate Mousse - Gluten Free and Vegan

Topped with fresh blackberries from my brother and sister in law's garden. Yum!


Another Ode to Laura, this recipe is one she made when she came to visit Marie right after Aiden was born last summer. Sorry it's such a fuzzy shot but I love this one. Aiden was just a tiny peanut here. Laura shared her recipe in this post.  

There are so many recipes I haven't taken the time to blog lately. Life has been busier than it used to be and I've been sharing the computer and desk with my hubby so getting to it isn't always working out. This is one treat that has been a draft for nearly a year so it's time to make it blog official.

I've made it well more than a dozen times since Laura served this but was surprised to find I had actually made it and posted it earlier that year! 

My nephew told me it was already there when I mentioned I had to get it on my blog so he could find it. Oh my gosh, I'm getting old and losing my mind already. 

Check out the filling for my yummy but not so pretty Creamy Chocolate Filled Coconut Whoopie Pies

This is such a great recipe, naturally gluten free and vegan. It takes five minutes to put together, is a great make ahead dessert and everyone loves it. The recipe below is a small tweak from Laura's and from my filling.

Don't you love the way Laura packed them up to serve? I usually use smaller mason jars because I tend to serve these as part of a dessert table.

Because they are rich and creamy, a small serving is satisfying but because it isn't heavy or overly sweet a large serving is perfect, too.


 Laura's Chocolate Mousse - Gluten Free and Vegan

1 Can Full Fat Coconut Milk
1/2 cup (8) Organic Medjool Dates, roughly chopped
1/3 Cup Cocoa or Cacoa Powder
1 teaspoon Vanilla Bean Powder

Combine all ingredients in a high speed blender (I use my Vitamix) or food processor until creamy and well mixed. There will be flecks of dates in the chocolate cream if you use a food processor. 

I like to fill tiny glasses with the mouse, chill and top with raspberries just like Laura when serving.

Enjoy!

This recipe has been happily shared on Gluten Free Wednesdays!

Wednesday, June 4, 2014

Olive, Garlic and Herb Dipping Oil!


If you have tried Laura's Garlic Herb Dip once, I bet you've made it several times. I still don't have the courage to add as many cloves of garlic as Laura does but we are hooked on that stuff.

It is absolutely amazing spooned over freshly baked crusty bread, but I love to drizzle it over grilled veggies, too.

The beauty of the recipe is that it really isn't a recipe. You just take a handful of fresh herbs of your choice and chop them up with some garlic, drizzle olive oil over the top and season.

Easy peasy.

Last week I had made a beautiful, crusty double loaf of Luce's New Italian Bread.

Charles Luce makes gluten free artisan bread so easy. I tweak the recipe ever so slightly and double it, baking it in a covered casserole instead of his baking bags. It comes out just right. The double sized loaf works better for my family.

We were getting ready to grill some veggies when I remembered Laura's dip.

I went outside to pick herbs and there just wasn't enough to make a nice amount so I grabbed a can of Santa Barbara Olive Company Olives. These are my favorite olives so only about 2/3 of the can made it into the dip. The texture and size of these olives are so perfect and they have several olives that are gluten free. A bonus is Santa Barbara is where my mom's family lived when I was young. The old mission on the label just makes me happy.

The result was really phenomenal. The olive texture and salty flavor worked so well with the garlic. The herbs I had on hand were fresh basil, mint, oregano and a tiny bit of chives. Any fresh herb you love works and the more flavors, the better. Because Laura loves olives I felt she'd approve of this addition. =D

We rounded out dinner with a roasted beet salad and it felt like the perfect summer meal.

Again, this really isn't a real recipe, but here's what I did.

Olive, Garlic & Herb Dipping Oil:

I chopped a handful fresh mixed herbs finely with 3 cloves of garlic.

When they were chopped I added about a cup of drained jumbo black olives and roughly chopped them.

I put the mixture in a bowl and covered with Extra Virgin Olive Oil. I used freshly ground Himalayan Salt, Black Pepper and Hot Hungarian Paprika to season the dipping oil. We have kept extra dipping oil two or three days in the fridge.

Happily shared on Gluten Free Wednesdays over at Gluten Free Easily!

Enjoy!